 Like you, I always stay up with the latest trends in file backup technology. Heck, who doesn't?
Pictured: Who doesn't.
To be completely honest, you never did have much of an excuse when you lost those super-important files during that computer melt-down a while back and had lazily neglected to back them up. Oh, you made a big bid for sympathy, all right, but we just laughed and sneered. There have always been zillions of backup programs around, and they've always been real easy to use. No, you really had no excuse at all.
And now, sadly, with cheap terabyte drives available, you'll have even less.
To take it through the timeline, first we backed up our precious files to floppy disk. Then came hard drives, so we used a variety of backup programs that would 'sync' two folders together, copying the new files in the first folder over to the backup folder.
Then came CD blanks, then DVD blanks, so that became the medium of choice for a decade. Their permanency and ease of storage made the media very attractive.
But even it had its flaws, like having to divide things up so they'd fit on a disc, and the time and hassle of the burning process, itself.
But the biggest problem was simply the size limitation. I have about 200 gigs total, spread across two drives and nine partitions, so that's about 45 to 50 discs if I wanted to back up the works. Yikes.
But now, with the recent advent of inexpensive monster-sized (terabyte) hard drives, the rules change once again. Given how much easier it is to click on a single button in SyncToy and back up the whole enchilada, this is clearly the way to go.
If you're wondering about price, I picked up one of the Seagate drives used in this test at BestBuy the other day for $75 on sale. Hook it in as a spare drive, download the free SyncToy and you're good to go.
And the next time a computer glitch eats those super-important files, you'll be the one who's laughing last.
A Matter of Perspective
While there's nothing particularly new here, the word terabyte conveys a meaning that can only be understood from an historical perspective. Allow me to explain.
From the minute the word "hard drive" was invented, we have always, always...
always
needed more drive space. "Disk Full" was the anti-mantra of a generation. They were the nightmare words we dreaded to see at every turn except the first few minutes after we installed a new drive. In that precious five or ten minutes, we relaxed with the thought that we had all of the hard drive space in the world.
Then the "Disk Full" nightmare started all over again until the next time we bought a bigger drive.
Even when drives hit the 300-, 400-gig mark, it still wasn't enough after partitioning, because these things tend to be proportional. If three partitions had 20, 60 and 100 gigs and you bought a bigger drive, you'd make the new partitions 40, 100 and 160 gigs. And promptly start fearing "Disk Full!" messages again.
But a terabyte.
That's the quantum leap everyone's been waiting for. Because now, with partitioning, we finally — after twenty-five years — have more space than we can sensibly* use.
*Even still I have to qualify this because if one starts doing something goofy, like saving DVDs to hard drive, you're going to fill things up no matter how many terabytes you throw at it.
Overview
True "backing up" means two distinct drives, not just partitions. Yes, backing up the stuff on partition D to partition E will save everything if D blows out, but it won't save a damn thing if the drive, itself, goes kaput.
And that's a lot more likely. Yeah, the C Drive (Windows) will melt down if you look at it cross-eyed, but storage drives very rarely actually blow out to the point where the data can't be read and copied to a safe place. Hard drives, however, suddenly not doing anything when you turn on the power in the morning isn't uncommon at all.
With that said, if you honestly can't rustle up a second drive, then back things up to a separate partition. Better that than nothing. Most systems have a D partition, so make a 'Backup' folder on it, then a bunch of sub-folders for your various files.
SyncToy
This is a Microsoft freebie, available here. The download button's down to the lower-right. You want the second (x86) version unless you have a 64-bit system (which you'll know if you do).
Disclaimer: This is fairly straightforward program. It works fine for me, but if you want something more sophisticated, there are zillions of them out there. Backup programs are a classic Junior Programmer's pet project. Do a search for "backup program sourceforge" for a good free version.
The Backup Drive
Before you pick up a hot new terabyte drive, you need to ascertain if your computer accepts the new SATA hard drives, or still uses the old IDE technology. If it's newer than 3 or 4 years, it probably accepts SATA drives, but you should double-check.
Pop open the tower and look. If the present hard drive has a wide, flat, probably-gray cable going to the back, it's IDE. If it has two normal-looking wires, one of them possibly red, it's SATA.
If it's a SATA drive, follow the (red?) wire to the motherboard. Make sure there's an identical, empty slot next to where it plugs in, ready for a second drive.
If it's an IDE drive, do the same with the wide cable. The existing cable probably has both of its "daisy-chain" jacks in use; one to the hard drive and one to the ROM drive, so you'll need a second (empty) slot on the motherboard for the backup drive. If two cables are already plugged into the motherboard and three of the jacks are in use, you can use the fourth, but you'll need to make sure the little jumper block on the back of the two units (sharing the same cable) are set to 'Master' on one unit and 'Slave' on the other.
Also, before you head to the store, make sure you have a second power lead and that it's long enough. The drive will come with the cable that goes to the motherboard but power leads are our department. Look at the existing drive to see what it looks like. SATA drives use a wide, thin black plug, IDE drives use a thicker white plug. If you're adding a SATA drive and don't see a spare SATA power plug, but you've got a spare white plug, buy a converter wire while you're at the store. It'll have a white female IDE-type jack on one end and the thin, black SATA plug on the other.
On the subject, sometimes the two SATA power leads are connected real close to each other (assuming the drives will be stacked close together in the rack), so pre-plan where you're going to put the second drive. You might need to pick up an 'extension cord' for the power lead, or use an IDE plug with a converter.
As to which drive to buy, bear in mind my drive speed post. Fifty bucks can make a big difference. Assuming your present drive is big enough for a storage drive, you might want to take the opportunity to pick up an ultra-fast SATA drive (see the article) and use it as your new system drive.
Hardware Hookup
Stick the cable into the motherboard (both SATA and IDE are polarized) and the back of the hard drive, then plug in the power lead. Fire up the rig and make sure the new drive's working before mounting it.
For the placement of the new drive, stick it wherever you want, at any angle you want. If you can slide it into the little rack, great. If not, just lay a couple of non-conductive somethings (plastic forks or knives?) across the bottom of the tower and lay the drive across them, raised for ventilation. I have the front and back edge of my system drive sitting across two blocks of medium-hard foam to reduce vibration and noise and the backup drive stuck in the rack.
Getting Organized
You'll want to look over your personal files and decide how you're going to categorize them on the backup drive. For the most part, you'll just mirror the original folders (if not an entire partition), but for ultra-large folders, or folders that have large (new) files that don't require backup, you might want to fine-tune things a bit when making SyncToy's 'presets'.
Go ahead and make your backup folders, but don't copy the files to them. SyncToy needs a nice, blank folder when you first make the entries or it may not find to-be-deleted files later on.
Backup
Fire up SyncToy. Click on 'Create New Folder Pair'. Browse to the original folder (or whole partition) on the left, the backup folder on the right, Next.
You can look over the three options but 'Echo' seems like the most logical choice for just backing up files and making sure renames and such get taken care of. Put in a name for the process and the window will close.
Click on 'Change Options:
— Check 'Exclude hidden files'. That'll keep it from copying the Recycle Bin folder, the 'System Volume Information' folder, etc.
— If you only want to include a few files, enter the names in the 'Include' box, and the asterisk works as a wildcard; i.e., "cool*" would include any file starting with "cool". Ditto excluding files. If you want to include or exclude an entire folder, click on 'Select subfolder'.
— If there are a number of large files on the backup drive to be deleted, check the 'Save overwritten...' box so it won't waste time writing them to the Recycle Bin.
To back up your files, just highlight the name on the left and click 'Run' on the lower-right. A few clicks and you're done. Sure beats the hell out of burning blank discs.
Note: Occasionally SyncToy stops for a bit to do a big comparative routine. The more files it's scanning, the longer the pause will take. Just wait it out.
It'll write a "SyncToy..." data file on both the source drive and backup drive. You can delete the one on the source drive if you want, but don't delete the one on the target drive or SyncToy won't be able to detect to-be-deleted files.
If for some reason it seems to get confused and isn't copying over new files, just delete the entry and make a new one. It'll give everything a fresh scan the first time through.
Bug Report: It'll delete the contents of a to-be-deleted folder, but not the folder, itself.
Checking Copied Files
As I disclaimed earlier, this is a fairly simple program and doesn't list the updated files. Normally, this doesn't make any dif, but if suddenly you want to know what files were just copied, it's easy enough to check.
Open Windows Search. What you want to do is search your whole backup drive or folder for:
*.*
Asterisk-dot-asterisk tells the computer "look for everything". In theory, it should list out every file in the backup area. Then it's just a matter of listing them by date and looking at the most 'recently-modified' files.
Isolating The Backup Drive
I have my backup drive on a power switch so it normally stays off, just in case some horrific new virus sweeps through the system, wiping out everything in its path. In lieu of a switch, and assuming the tower is easy to access, you could just literally pull the plug on the drive when it's not in use.
Here's how to put in a switch. If it's an IDE drive, the power wire will have a white plug and four wires leading to it, easy to access. SATA power cords are more complicated, so I'd recommend you buy an 'extension cord' for the IDE type of power plug. It'll be about 8 inches long and have a white male and female jack on the ends. That's the piece you'll cut into for the switch. Then, if the new drive is SATA, buy a converter piece that converts from the IDE plug type to SATA.
You're going to cut into two power wires (5v for the drive's electronics and 12v for the motor), so you need what's called a "double-pole" switch; one that has two separate 'in' and 'out' contacts so it can turn two different wires on and off at the same time. I think Radio Shack still carries them in the store, or try any electronics outlet. Living on a boat, I couldn't stop myself from using a helm switch:
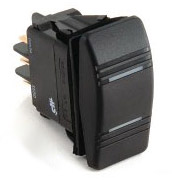
Regardless of what type of switch you pick up, it should say "DPST" or "DPDT" on the package, with the "DP" part standing for "double pole", meaning it controls two independent wires. You also want to make sure it's just a 2-position switch, on-off, not a 3-position switch, on-off-on.
You'll also need a few feet of wire to lead out to the switch and back. Anything will do, even speaker wire. These are low-amperage lines.
— Grab the IDE power lead and cut the yellow and red power wires. Strip back the ends and attach the extra wire to them. You can use solder, wire nuts or crimp connectors if you want, but just twisting the wires together and wrapping things up with some electrical tape is good enough.
— Sneak the wires out the back of the tower and attach the leads to the switch. Some switches have tiny connection points and you'll probably need to solder them. Some switches, like the above, use slide-on 'spade' terminals, so you'd need to pick some up and use pliers to crimp them onto the wires, then they'll easily slide onto the switch.
I should probably note that you'll blow up the hard drive if you cross any of the wires, so make sure you keep the red and yellow wires separate, and make sure you know which terminals on the switch to attach the wires to. If you have an ohmmeter, use it to double-check the switch's connection points.
If looks are important, you can buy a plastic 'experimenter's box' at the Shack to house the switch (good electronics outlets will also have metal ones), then use double-sided 'mirror tape' to stick the box to the side of the tower. If looks aren't important, just stick the switch to the tower.
And that should do it. Firing up the backup drive will require a reboot, and I'd suggest you actually shut down the system, flip on the backup drive, then turn everything back on. Ditto turning it back off. Both Windows and the hardware end of things (like the power supply) deserve some respect in this department. You can plug and unplug removable devices all day long, but you don't want to mess around turning hard drives on and off while the system is up.


Tracked: Apr 13, 19:07
Programs AutoSizer � This has two great uses. It'll pop open the browser (or any program) in full-screen mode every time it opens, and for small programs that tend to open wherever they want (like Calculator), it will make them open right in
Tracked: Apr 16, 16:11
Here's an index of my Maggie's Computin' Tips. I can't guarantee all of these will work on every Windows operating system, but most should. Programs AutoSizer � This has two great uses. It'll pop open the browser (or any program) in full-s
Tracked: Jul 10, 11:20
Here's an index of my Maggie's Computin' Tips. I can't guarantee all of these will work on every Windows operating system, but most should. Programs AutoSizer � This has two great uses. It'll pop open the browser (or any program) in full-s
Tracked: Jul 10, 11:24
Here's an index of my Maggie's Computin' Tips. I can't guarantee all of these will work on every Windows operating system, but most should. Programs AutoSizer � This has two great uses. It'll pop open the browser (or any program) in full-scr
Tracked: Jul 22, 19:44
Here's an index of my Maggie's Computin' Tips. I can't guarantee all of these will work on every Windows operating system, but most should. Programs AutoSizer � This has two great uses. It'll pop open the browser (or any program) in full-scr
Tracked: Jul 22, 21:39
Here's an index of my Maggie's Computin' Tips. I can't guarantee all of these will work on every Windows operating system, but most should. Programs AutoSizer � This has two great uses. It'll pop open the browser (or any program) in full-s
Tracked: Jul 23, 13:06
Here's an index of my Maggie's Computin' Tips. I can't guarantee all of these will work on every Windows operating system, but most should. Programs AutoSizer � This has two great uses. It'll pop open the browser (or any program) in full-s
Tracked: Aug 28, 08:29
Here's an index of my Maggie's Computin' Tips. I can't guarantee all of these will work on every Windows operating system, but most should. Programs AutoSizer — This has two great uses. It'll pop open the browser (or any program) in full
Tracked: Jan 08, 19:59