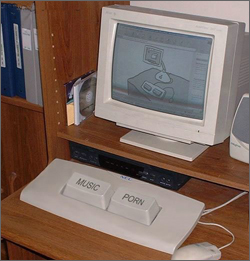
 This will cover generally cleaning your keyboard, thoroughly cleaning your keyboard, and repair.
A lot of keyboards over the years have been tossed in the trash "because the (fill in blank) key stopped working!" That's not to be confused with the Any Key not working, which we'll cover later.
If a key starts getting a little erratic or stops working altogether, chances are it's just a piece of grit that got in between the two layers of plastic sheets that reside inside the unit. The ESC key going out is the most common, just because it sits up in the corner by itself near the edge of the plastic sheets where a piece of grit could sneak in.
Amazingly, of all the pieces of computer gear, this is the one item you actually can fix yourself, and without a lot of effort. Just take a large garden hose and-, no, wait, I'm getting ahead of the story.
Basic Cleaning
This means everything visible but not actually taking it apart and cleaning the innards.
The first step is to pop off all the keys. You might want to first make a quick sketch of where they all go or take a pic or two. Grab a couple of butterknives (or the back end of a tweezers, etc) and pry them straight up. The space bar is a little tricky so just leave it alone.
Spray some 409 on a paper towel and clean the casing. Dump the keys into the kitchen sink, blast 'em with 409, let 'em soak for a while. Rinse them well, blow into the bottom part to knock out any loose water, let 'em dry thoroughly, maybe in front of a hairdryer on 'low' or out in the sun.
Pop the keys back on, making sure to push straight down on them. They should have a little alignment notch, so make sure that's correct.
Thorough Cleaning / Repair
If a key is balky or flat-out not working, this is what you'll need to do.
When it comes to mere cleaning, I suppose this would fall under the heading of 'preventative maintenance', in that you're just making sure a key won't stop working in the near future. But since it really only takes a few extra minutes than doing the above, I usually go ahead and do the whole routine.
First, remove all of the keys as above. You can leave the space bar alone as it's a bit tricky to get on and off.
To get the casing apart, you might need a special tool for the bottom screws. If they're not small Phillips screws, they'll probably be a 'star point', which is like an Allen wrench but with five points instead of six. The tool should be available at any good hardware store. You should bring the keyboard along with you for an exact match, as long as you don't mind the shocked gasps of the other customers when they see how disgustingly filthy it is.
When the screws are removed, hold the two parts firmly together and tip it back upright and lift off the top.
Note how the plastic and rubber sheets fit together. There'll be a small circuit board, so note where it's placed and how it contacts the plastic sheet. It'll probably have a little foam rubber bar to keep it pressed against the plastic sheet.
Carefully take everything apart. Dump the keys and casing parts into the kitchen sink and blast the hell out everything with 409. Rinse everything well, making sure the keys are totally dry as mentioned above.
For the rubber and plastic sheets, use Windex. 409 will leave a bit of residue.
Now take the eraser end of a pencil and scrub the contact points on the circuit board (where they touch the plastic) until they're shiny-clean.
Carefully reinstall the parts, slip the top back on, then put one end over the edge of the table and put at least one of the end screws back in, if not both. Turn it around and do the same to the other end. Then tip it upside-down and put in the remaining screws. Don't overtighten them; just 'snug' will do.
Pop the keys back on as above.
Plug in it, fire it up and test it out. I once did this and when I hit certain keys, other characters would also pop on the page, very bizarre. I took it apart and some of the keys hadn't quite dried and a driblet or two of water had gotten in between the plastic sheets, creating havoc. It was probably the jolt of popping them back onto the keyboard that shook the droplets loose, so make sure those keys are dry.
The Elusive 'Any' Key
Back in the mid-90's, when computers really started catching on, I read an article that listed the top ten complaints received by some tech firm's customer support service. Number one on the list was "People not being able to find the 'Any' key." This was back when most peripheral devices, like CD-ROMs, scanners and printers needed a floppy disc inserted to install the right 'driver' file. To begin the process, it would instruct to you to "hit any key to continue". But since the people writing the message wanted it to look important and eye-catching, it would often be written like this:
Hit Any Key to Continue.
People would look around for the 'Any' key, not find it, and immediately call Tech Support.
O, sweet days of innocence!


 This will cover generally cleaning your keyboard, thoroughly cleaning your keyboard, and repair.